F-4 salvage: Difference between revisions
No edit summary |
Pbcjohnston (talk | contribs) mNo edit summary |
||
| (24 intermediate revisions by 2 users not shown) | |||
| Line 1: | Line 1: | ||
[[File:F- | [[File:New Header F-class.jpg]] | ||
=== <big>The Crew</big> === | === <big>The Crew</big> === | ||
| Line 8: | Line 8: | ||
File:F-4 Ashcroft.jpg|George T. Ashcroft, GM 1c | File:F-4 Ashcroft.jpg|George T. Ashcroft, GM 1c | ||
File:F-4 Buck.jpg|Clark G. Buck, GM 2c | File:F-4 Buck.jpg|Clark G. Buck, GM 2c | ||
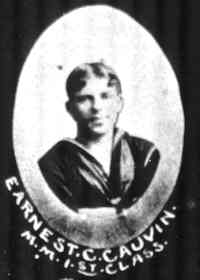
File:F-4 Cauvin.jpg|Ernest C. Cauvin, MM 1c | File:F-4 Cauvin.jpg|[[Cauvin|'''Ernest C. Cauvin, MM 1c''']] | ||
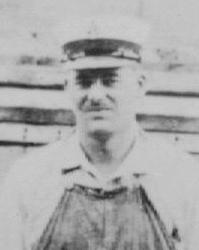
File:F-4 Colwell.jpg|Harley Colwell, CEM | File:F-4 Colwell.jpg|[[Colwell|'''Harley Colwell, CEM''']] | ||
File:F-4 Covington.jpg|Walter F. Covington, MM 1c | File:F-4 Covington.jpg|Walter F. Covington, MM 1c | ||
File:F-4 Deeth.jpg|George L. Deeth, EM 1c | File:F-4 Deeth.jpg|George L. Deeth, EM 1c | ||
File:F-4 Ede.jpg|Alfred L. Ede, LT, Commanding Officer | File:F-4 Ede.jpg|[[Ede|'''Alfred L. Ede, LT, Commanding Officer''']] | ||
File:F-4 Gilman.jpg|Frederick Gilman, GM 1c | File:F-4 Gilman.jpg|Frederick Gilman, GM 1c | ||
File:F-4 Grindle.jpg|Aliston H. Grindle, CEM | File:F-4 Grindle.jpg|Aliston H. Grindle, CEM | ||
| Line 19: | Line 19: | ||
File:F-4 Hughson.jpg|Francis M. Hughson, MM 1c | File:F-4 Hughson.jpg|Francis M. Hughson, MM 1c | ||
File:F-4 Jennie.jpg|Albert F. Jennie, EM 2c | File:F-4 Jennie.jpg|Albert F. Jennie, EM 2c | ||
File:F-4 Lunger.jpg|Archie H. Lunger, GM 2c | File:F-4 Lunger.jpg|[[Joined Fates|'''Archie H. Lunger, GM 2c''']] | ||
File:F-4 Mahan.jpg|Ivan L. Mahan, MM 1c | File:F-4 Mahan.jpg|Ivan L. Mahan, MM 1c | ||
File:F-4 Moore.jpg|Horace L. Moore, GM 1c | File:F-4 Moore.jpg|Horace L. Moore, GM 1c | ||
File:F-4 Nelson.jpg|William S. Nelson, CMM | File:F-4 Nelson.jpg|William S. Nelson, CMM | ||
File:F-4 Parker.jpg|Timothy A. Parker, LT, Executive Officer | File:F-4 Parker.jpg|Timothy A. Parker, LT, Executive Officer | ||
File:F-4 Pierard.jpg|Frank C. Pierard, CGM | File:F-4 Pierard.jpg|[[Joined Fates|'''Frank C. Pierard, CGM''']] | ||
File:F-4 Wells.jpg|Charles H. Wells, MM 2c | File:F-4 Wells.jpg|Charles H. Wells, MM 2c | ||
File:F-4 Withers.jpg|Henry A. Withers, GM 1c | File:F-4 Withers.jpg|Henry A. Withers, GM 1c | ||
| Line 42: | Line 42: | ||
[[File:Red bar sub new.jpg]] | [[File:Red bar sub new.jpg]] | ||
[[File: | [[File:F1crew F4crew-4.jpg|left|500px|Photo taken on deck of USS F-1 with 6 from F-4]] | ||
This photo of submarine crews contains six men from the ill-fated F-4. The photo appears to have been taken on the deck of the F-1. EM 1c George L. Deeth is the second man from right. To his right (camera left) is MM 1c Edwin Hill. On the other side of Deeth is MM 1c Francis M. Hughson. The man in the center with the coveralls is CEM Harley Colwell. The second man from left is GM 2c Archie H. Lunger. Seated, second from right is CGM Frank C. Pierard. The rest of the men are not identified and are no doubt F-1 crew members . This photo taken prior to March 25, 1915. | This photo of submarine crews contains six men from the ill-fated F-4. The photo appears to have been taken on the deck of the F-1. EM 1c George L. Deeth is the second man from right. To his right (camera left) is MM 1c Edwin Hill. On the other side of Deeth is MM 1c Francis M. Hughson. The man in the center with the coveralls is CEM Harley Colwell. The second man from left is GM 2c Archie H. Lunger. Seated, second from right is CGM Frank C. Pierard. The rest of the men are not identified and are no doubt F-1 crew members . This photo taken prior to March 25, 1915. Lunger & Pierard were Brother-in-laws, married to sisters. Pierard had children, Lungers wife was pregnant but he never got to see his child. Read their story [[Joined Fates|'''here''']]. | ||
The one F-1 known crew member is CMM John Peter Albert Messang. He was aboard the USS F-1 when it was in collision with the F-3 | The one F-1 known crew member is CMM John Peter Albert Messang seated first man on right. He was aboard the USS F-1 when it was in collision with the F-3 in 1917 and sank taking Messang and 18 other of the crew to their deaths. Three were saved. | ||
<small>Photo in the private collection of Ric Hedman.</small> | <small>Photo in the private collection of Ric Hedman.</small> | ||
| Line 65: | Line 65: | ||
<div style="text-align: justify;"><span style="color:#00008B">Once it was realized that F-4 had not returned when it should, all manner of craft went out from Honolulu to search for the boat. It must be remembered that in 1915 Hawaii was an undeveloped paradise with little modern infrastructure. The F-boats were based in Honolulu because the base at Pearl Harbor was in its infancy and was not yet capable of supporting warships. In 1915 Hawaii was still a remote outpost. | <div style="text-align: justify;"><span style="color:#00008B">Once it was realized that F-4 had not returned when it should, all manner of craft went out from Honolulu to search for the boat. It must be remembered that in 1915 Hawaii was an undeveloped paradise with little modern infrastructure. The F-boats were based in Honolulu because the base at Pearl Harbor was in its infancy and was not yet capable of supporting warships. In 1915 Hawaii was still a remote outpost. | ||
Here | Here three men are in a very small rowboat. Two of them are using a box with a glass plate in the bottom that allowed a clearer view of things underwater. These boxes actually worked quite well, but only to view divers at shallower depths. The water at the wreck's original depth was far too deep for these men to see the wreck in any detail. | ||
<small>Photo in the private collection of Ric Hedman.</small> | <small>Photo in the private collection of Ric Hedman.</small> | ||
| Line 72: | Line 72: | ||
[[File:F-4 salvage 2.jpg|left|500px]] | [[File:F-4 salvage 2.jpg|left|500px]] | ||
<div style="text-align: justify;"><span style="color:#00008B">Early in the search the Navy was using every means to locate the lost submarine. All they had to go on was some air bubbles and oil. They began dragging grapples in hopes of snagging the lost vessel. These hopes were soared when a heavy object was hooked. It turned out to be the lost three and a half ton anchor from the battleship USS Oregon ( | <div style="text-align: justify;"><span style="color:#00008B">Early in the search the Navy was using every means to locate the lost submarine. All they had to go on was some air bubbles and oil. They began dragging grapples in hopes of snagging the lost vessel. These hopes were soared when a heavy object was hooked. It turned out to be the lost three and a half ton anchor from the battleship [http://www.navsource.net/archives/01/03a.htm '''USS Oregon (Battleship No. 3)''']. The Oregon lost her port anchor on May 30, 1901 due to a defective chain link. Chief Bosun J.E. Murphy was nearly killed when the link parted. Murphy was a hero in the Battle of Santiago during the Spanish-American War. | ||
According to the Board of Investigation Report, when the anchor was discovered | According to the Board of Investigation Report, when the anchor was discovered Chief Gunners Mate Jack Agraz, a Navy diver from the USS F-1, donned his gear and followed the line to the target. Three crews of four men each manned the hand turned air pump supplying air to him. He discovered the grapple chain was wrapped around "an old anchor" at 215 feet. The F-4 had not been found. | ||
<small>Photo in the private collection of Ric Hedman.</small> | <small>Photo in the private collection of Ric Hedman.</small> | ||
| Line 81: | Line 81: | ||
[[File:F-4 salvage 3.jpg|left|500px]] | [[File:F-4 salvage 3.jpg|left|500px]] | ||
<div style="text-align: justify;"><span style="color:#00008B">Another false alarm when part of the periscope was discovered. | <div style="text-align: justify;"><span style="color:#00008B">Another false alarm when part of the periscope was discovered. The newspaper article describes the early search that went on for the F-4 and the recovery of a portion of one of her periscopes. The highlighted section refers to an object in the F-4 Legacy section below. | ||
<small>Photo in the private collection of Ric Hedman.</small> | <small>Photo in the private collection of Ric Hedman.</small> | ||
| Line 88: | Line 88: | ||
[[File:F-4 salvage 7 agraz.jpg|left|500px]] | [[File:F-4 salvage 7 agraz.jpg|left|500px]] | ||
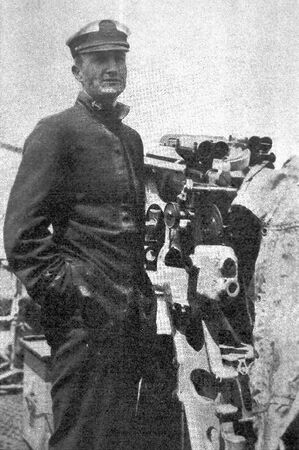
<div style="text-align: justify;"><span style="color:#00008B">Chief Gunners Mate (Torpedo) John "Jack" Agraz, USN was a diver and a crewmember on the F-4's sister boat F-1. Agraz would make dozens of dives during the search for F-4. He was a large and powerful man, with the constitution of an ox. His friends described him as fearless and determined, full of guts and stubbornness. He had been born in Guadalajara, Mexico in 1879 and had come to the United States in 1904 seeking adventure, which he found in the U.S. Navy. He made dives to over 200 feet with a Schrader Mk IV diving helmet and breastplate resting on his shoulders, ''without wearing a watertight diving suit or weights!'' He wore only long john underwear and a pair of deck shoes. He did not decompress on the way up (that was still a developing science) and never suffered from the bends. He was performing physical feats that astounded the men he worked with. His bravery was unquestioned. | <div style="text-align: justify;"><span style="color:#00008B">Chief Gunners Mate (Torpedo) John "Jack" Agraz, USN was a diver and a crewmember on the F-4's sister boat F-1. Agraz would make dozens of dives during the search for F-4. He was a large and powerful man, with the constitution of an ox. His friends described him as fearless and determined, full of guts and stubbornness. He had been born in Guadalajara, Mexico in 1879 and had come to the United States in 1904 seeking adventure, which he found in the U.S. Navy. He made dives to over 200 feet with a Schrader Mk IV diving helmet and breastplate resting on his shoulders, ''without wearing a watertight diving suit or weights!'' He wore only long john underwear and a pair of deck shoes. Without a watertight suit the water came up into the helmet, with the air pressure keeping the level just below his chin. He did not decompress on the way up (that was still a developing science) and never suffered from the bends. He was performing physical feats that astounded the men he worked with. His bravery was unquestioned. | ||
<small>Photo in the private collection of Ric Hedman.</small> | <small>Photo in the private collection of Ric Hedman.</small> | ||
| Line 103: | Line 103: | ||
[[File:F-4 salvage 5.jpg|left|500px]] | [[File:F-4 salvage 5.jpg|left|500px]] | ||
<div style="text-align: justify;"><span style="color:#00008B">A rather crowded diving launch hovering over the scene of F-4's sinking. Given the fact that none of the men appear to be operating the pump, it is unlikely that there is a diver in the water from this launch. The men are intently trying to peer though the water, with one man using a glass bottomed bucket to try to see better. Most of the diving on the F-4 was conducted from these launches, as there were no specialized salvage ships in Hawaii at that time. | <div style="text-align: justify;"><span style="color:#00008B">A rather crowded diving launch hovering over the scene of F-4's sinking. Given the fact that none of the men appear to be operating the pump, it is unlikely that there is a diver in the water from this launch. The men are intently trying to peer though the water, with one man using a glass bottomed bucket to try to see better. Most of the diving on the F-4 was conducted from these launches, as there were no specialized salvage ships in Hawaii at that time. | ||
<small>Photo in the private collection of Ric Hedman.</small> | |||
[[File:Red bar sub new.jpg]] | |||
[[File:F-4 salvage 11.jpg|left|500px]] | |||
<div style="text-align: justify;"><span style="color:#00008B">Looking closely at this photo you can see the men at work pumping air to a diver below. The men worked in crews of four for a short period of time before being relieved for a break. | |||
<small>Photo in the private collection of Ric Hedman.</small> | <small>Photo in the private collection of Ric Hedman.</small> | ||
| Line 109: | Line 116: | ||
[[File:F-4 salvage 6.jpg|left|500px]] | [[File:F-4 salvage 6.jpg|left|500px]] | ||
<div style="text-align: justify;"><span style="color:#00008B">Here is an interesting action photo. It appears that a diver has come to the surface (possibly Agraz) | <div style="text-align: justify;"><span style="color:#00008B">Here is an interesting action photo. It appears that a diver has come to the surface (possibly Agraz). His helmet and breast plate have been removed and he has slid back into the water. You can see his form just below the surface. One man has his arm into the water and looks to have a hold of him. A second man is reaching for him and everyone else is looking on in concern. Someone may have pulled the helmet off too early. | ||
<small>Photo in the private collection of Ric Hedman.</small> | <small>Photo in the private collection of Ric Hedman.</small> | ||
[[File:Red bar sub new.jpg]] | |||
[[File:F-4 divers Agraz and Chief Gunners Mate G.R. Evans.jpg|left|500px]] | |||
Jack Agraz and Chief Gunner's Mate G.R. Evans taking a break during the search phase of F-4 diving operations, circa March, 1915. | |||
<small>U.S. Navy photo from the Vallejo Naval Museum via Darryl Baker.</small> | |||
[[File:Red bar sub new.jpg]] | [[File:Red bar sub new.jpg]] | ||
| Line 125: | Line 139: | ||
<small>Copyright The New York Times</small> | <small>Copyright The New York Times</small> | ||
[[File:Red bar sub new.jpg]] | |||
[[File:F-4 salvage HSB 1 Apr 1915 pg 1.jpg|left|400px]] | |||
This article is from the Honolulu Star Bulletin dated April 1, 1915. It describes the work to build and test a diving chamber that would be used to survey the wreck and determine further courses of action. The great depth at which F-4 laid was difficult for divers to work at. Sending them down in a pressurized chamber would be much safer than the no-dress open helmet rigs then being used. | |||
<small>Copyright The Honolulu Star Bulletin. Retrieved from the Vallejo Naval Museum by Darryl Baker.</small> | |||
[[File:Red bar sub new.jpg]] | |||
[[File:F-4 diving chamber.jpg|left|500px]] | |||
A nice photo of the diving chamber. No actual work could be performed from it, and it was for observational purposes only. The chamber would be lowered to various locations around the wreck, allowing a complete survey to be performed that would greatly aid in the subsequent salvage efforts. The divers inside could observe in relative safety and comfort. Air was surface supplied through hoses, and telephone lines were provided so that real time observations could be called back up to the surface. Diver Jack Agraz and another engineer made the initial test dives in Honolulu Harbor to verify its integrity, and likely made the first dives to the bottom near the wreck. | |||
<small>U.S. Navy photo from the Vallejo Naval Museum via Darryl Baker.</small> | |||
[[File:Red bar sub new.jpg]] | [[File:Red bar sub new.jpg]] | ||
| Line 134: | Line 162: | ||
[[File:F-4 salvage 9.jpg|left|500px]] | [[File:F-4 salvage 9.jpg|left|500px]] | ||
<div style="text-align: justify;"><span style="color:#00008B">The F-4 was soon found and it was determined that the crew was lost. The Navy was determined to salvage the vessel, but deep water salvage was still very much a developing science and therefore they lacked the technical ability to do so. Naval Constructor LCDR Julius Furer was assigned to lead the effort and he determined that lifting the boat with pontoons was going to be the best method. Six pontoons had to be built at the Mare Island Navy Yard. This is a starboard quarter view of the Pennsylvania-class armored cruiser USS Maryland (Armored Cruiser No. 8) with the six specially made pontoons loaded aboard. The Maryland was standing by at Mare Island and as soon as the pontoons were ready they were loaded and the Maryland steamed at full speed to Hawaii with the cargo, along with a host of specialized salvage gear, diving equipment, and experienced deep-sea divers. There are four pontoons loaded aft and two loaded forward. | <div style="text-align: justify;"><span style="color:#00008B">The F-4 was soon found and it was determined that the crew was lost. The Navy was determined to salvage the vessel, but deep water salvage was still very much a developing science and therefore they lacked the technical ability to do so. Naval Constructor LCDR Julius Furer was assigned to lead the effort and he determined that lifting the boat with pontoons was going to be the best method. Six pontoons had to be built at the Mare Island Navy Yard. This is a starboard quarter view of the Pennsylvania-class armored cruiser [https://www.navsource.net/archives/04/acr8/acr8.htm '''USS Maryland (Armored Cruiser No. 8)'''] with the six specially made pontoons loaded aboard. The Maryland was standing by at Mare Island and as soon as the pontoons were ready they were loaded and the Maryland steamed at full speed to Hawaii with the cargo, along with a host of specialized salvage gear, diving equipment, and experienced deep-sea divers. There are four pontoons loaded aft and two loaded forward. | ||
<small>Photo in the private collection of Ric Hedman.</small> | <small>Photo in the private collection of Ric Hedman.</small> | ||
| Line 148: | Line 176: | ||
[[File:F-4 salvage 8.jpg|left|500px]] | [[File:F-4 salvage 8.jpg|left|500px]] | ||
<div style="text-align: justify;"><span style="color:#00008B">The dredge California was moved from | <div style="text-align: justify;"><span style="color:#00008B">The dredge California was moved from Pearl Harbor, where she was being used to deepen the harbor, to the F-4 location with thoughts she could raise the F-4. Ultimately, she was used to position the cables and chains under the F-4. She is seen here with the Young Brothers launch/tug Louise alongside and an unidentified tug in the background. | ||
<small>Photo in the private collection of Ric Hedman.</small> | <small>Photo in the private collection of Ric Hedman.</small> | ||
| Line 154: | Line 182: | ||
[[File:Red bar sub new.jpg]] | [[File:Red bar sub new.jpg]] | ||
<center> | |||
<gallery mode="packed" perrow=4 widths="300px" heights="200px"> | |||
File:F-4 diving suits and helmets.jpg | |||
File:F-4 diving helmet telephone equipment.jpg | |||
File:F-4 diving decompression chamber on scow.jpg | |||
</gallery> | |||
</center> | |||
These three photos are very interesting to the naval historian. In 1915 Navy Chief Gunner George Stillson was still in the development phase for the well-known Mark V diving dress that would come to prominence in the 1920s. The Mk V was the ultimate refinement of the hard hat diving rigs, and was the envy of the world's diving community. But it didn't pop into existence overnight. Stillson and his team experimented with and evaluated nearly all of the available diving helmets and rigs in U.S. at the time, finding out which features worked and which didn't. The lessons learned where all poured into the highly refined Mk V. | |||
Since the Mk V was not yet developed during the F-4 salvage, the divers used whatever was in the Navy's stock at the time. This was represented by a variety of rigs, at least two of which are represented in the first picture. Four diving suits are hanging up to dry in the background. In the foreground are three helmets of two different designs. | |||
The helmet on the left was manufactured by a company called A. Schrader's Son Inc. of New York City. This view is of the left side of the helmet and attached breast plate, with the helmet turned slightly to the left. It is a four window (called a "light") model. The Schrader design is characterized by round side and front lights with an oval shaped top light. The front light (the one in front of the diver's face) is removable by a screwing action. Slightly behind and below the left side light is a cup that housed a recessed telephone speaker/microphone. There are twelve bolts on the breast plate that secure removable clamp bars that hold the breast plate to the diving suit. In the Navy inventory this helmet and breast plate would be known as a Mk IV. | |||
The other two are curiosities. These two were made by the A.J. Morse & Son Company in Boston. These are three light models (no top light) with oval side lights, a hallmark of the Morse design. The absence of a top light indicates that these are likely not Navy stock models and are from Morse's commercial line. The Navy really preferred having a top light as it gave the diver better visibility. These commercial models were likely commandeered by the Navy due to the lack of suitable diving rigs in their inventory. The helmet on the right is a view of the back of the helmet, showing the exhaust valve and vertical bubble tube diffuser ''behind'' the right side light. This was an awkward arrangement shared by both the Morse and Schrader helmets and was disliked because it was hard to reach by the diver. The Navy version of the Morse design had the top light and was known as a Mk III. | |||
The second photo shows an actual Morse Mk III four light helmet. The photo illustrates an early telephone arrangement, with the wire leading into a watertight connection on the back of the helmet. Before use the helmet wire would be covered by a rubber sheath to prevent electrical shorts. On the left on top of the box is a headset and speaking mic likely used by the topside telephone man to talk to the diver. In this early rig the diver likely wore a headset as well. Later versions would use a simpler combination speaker/mic located in a recessed cup on the front of the helmet. | |||
The third photo shows a decompression chamber on the diving barge during the salvage phase. [https://en.wikipedia.org/wiki/Decompression_sickness '''Decompression sickness'''], also known as "the bends", is an omnipresent danger for deep-sea divers. The decompression chamber was used to recompress the dissolved nitrogen in the divers blood, preventing it from bubbling up in the blood stream and crippling or even killing the diver when they returned to the lower pressure surface. The chamber allowed the gradual removal of the pressure, allowing the diver's body to remove the unneeded chemical through normal breathing. These principals and a series of detailed tables to guide the decompression process were developed by [https://en.wikipedia.org/wiki/Haldane%27s_decompression_model '''John Scott Haldane'''] and were just coming into accepted use by the USN at the time of the F-4 salvage work. | |||
<small>U.S. Navy photos from the Vallejo Naval Museum via Darryl Baker.</small> | |||
[[File:Red bar sub new.jpg]] | |||
[[File:F-4 diver from behind.jpg|left|400px]] | |||
This photo shows a diver during the salvage phase utilizing a Morse helmet with oval side lights. It is not clear if the helmet is a three or four light model. This shows another variation in the telephone line inlet, above and to the right of the air hose inlet, opposite of the Morse helmet shown in the second gallery photo above. There were a lot of on-the-spot modifications being made to the helmet configurations during this operation, as divers learned quickly what was working and what was not. Also, incorporating commercial helmets required bringing them up to Navy standard, forcing many field modifications. This diver does not have a weight belt on, and the authors are not entirely sure if the familiar weight belt with shoulder straps was yet being used. | |||
<small> | <small>U.S. Navy photos from the Vallejo Naval Museum via Darryl Baker.</small> | ||
[[File:Red bar sub new.jpg]] | [[File:Red bar sub new.jpg]] | ||
<div style="text-align: justify;"><span style="color:#000000"> | |||
=== <big>Raising the Boat with Pontoons</big> === | |||
</div> | |||
[[File:F-4 salvage 12.jpg|left|500px]] | [[File:F-4 salvage 12.jpg|left|500px]] | ||
| Line 178: | Line 235: | ||
[[File:Red bar sub new.jpg]] | [[File:Red bar sub new.jpg]] | ||
<center> | <center> | ||
<gallery mode="packed" widths=" | <gallery mode="packed" widths="300px" heights="200px"> | ||
File:F-4 salvage 14 pontoons 1.jpg | File:F-4 salvage 14 pontoons 1.jpg | ||
File:F-4 salvage 14 pontoons 2.jpg | File:F-4 salvage 14 pontoons 2.jpg | ||
| Line 194: | Line 246: | ||
</gallery> | </gallery> | ||
</center> | </center> | ||
<div style="text-align: justify;"><span style="color:#00008B">Pontoons can be tricky beasts to work with, and this series of photos show the efforts made by the salvage force lifting the F-4 from the bottom. Cables suspended below these pontoons were slung under the F-4, and once the water was forced out of the pontoons with compressed air, they physically lifted the F-4 off the bottom. In several of the photos a man can be seen standing on a pontoon wearing overalls and a bowler hat. That is Master Rigger Fred Busse, a member of Furer's team, supervising the rigging process. Note that many of the pontoons are not floating level, and balancing them was a constant headache. In several of the pictures the USS Navajo (Fleet Tug No. 52) is seen standing by to assist. | <div style="text-align: justify;"><span style="color:#00008B">Pontoons can be tricky beasts to work with, and this series of photos show the efforts made by the salvage force lifting the F-4 from the bottom. Cables suspended below these pontoons were slung under the F-4, and once the water was forced out of the pontoons with compressed air, they physically lifted the F-4 off the bottom. In several of the photos a man can be seen standing on a pontoon wearing overalls and a bowler hat. That is Master Rigger Fred Busse, a member of Furer's team, supervising the rigging process. Note that many of the pontoons are not floating level, and balancing them was a constant headache. In several of the pictures the [https://www.navsource.net/archives/09/47/47052.htm '''USS Navajo (Fleet Tug No. 52)'''] is seen standing by to assist. | ||
In the third photo the small tug, behind the speeding launch, is the the Young Brothers "Louise", one of their small flotilla of commercial vessels for hire that was were used by the Navy in this salvage operations.</span> | In the third photo the small tug, behind the speeding launch, is the the Young Brothers "Louise", one of their small flotilla of commercial vessels for hire that was were used by the Navy in this salvage operations.</span> | ||
| Line 247: | Line 299: | ||
[[File:F-4 salvage dd 1.jpg|left|500px]] | [[File:F-4 salvage dd 1.jpg|left|500px]] | ||
<div style="text-align: justify;"><span style="color:#00008B">Without a drydock of their own (the Pearl Harbor facilities were far from finished), the Navy was forced to contract with the Inter Island Steam Navigation Company for use of their drydock. It was located at the foot of Nu'uanu Avenue along Queen Street, what is now called Nimitz Highway (Rt 92). F-4 is shown here in the dock on August 31, 1915. A crowd of men has gathered to examine the remains of the boat. This view is looking at the nearly upside down F-4's bow, with pontoons on each side. Behind is the Hilo based | <div style="text-align: justify;"><span style="color:#00008B">Without a drydock of their own (the Pearl Harbor facilities were far from finished), the Navy was forced to contract with the Inter Island Steam Navigation Company for use of their drydock. It was located at the foot of Nu'uanu Avenue along Queen Street, what is now called Nimitz Highway (Rt 92). F-4 is shown here in the dock on August 31, 1915. A crowd of men has gathered to examine the remains of the boat. This view is looking at the nearly upside down F-4's bow, with pontoons on each side. Behind F-4 is the Hilo based tugboat Printer that had reserved dry dock time to repair her hull after a collision with one of her scows. | ||
At the time | At the time of the Navy contract the drydock had been reserved for the tug Printer, recently sold to Hilo businessman G. B. Marshall. He needed the tug to help to build the breakwater at Hilo Harbor for which he had won the contract. Printer needed some repairs after a collision with one of her rock hauling scows, and the new owners wired the dry dock and reserved space to have work done. When the F-4 was finally raised and moved to the dry dock there was room for the Printer to fit aft of her. It was expected the repairs to the Printer would require 24 hours of work night and day to get the rush job done, but with the F-4 now in the dock with her the work on Printer could proceed at a more leisurely pace. Note the scaffolding has yet to be put in place around the tug. | ||
<small>Newspaper photo.</small> | <small>Newspaper photo.</small> | ||
| Line 270: | Line 322: | ||
[[File:F-4 salvage dd 4.jpg|left|500px]] | [[File:F-4 salvage dd 4.jpg|left|500px]] | ||
<div style="text-align: justify;"><span style="color:#00008B">Once the dock was fully out of the water, the full extent of the damage to the F-4 was visible for the first time. The implosion started in the overhead of the torpedo room, near the torpedo loading hatch. It was a natural weak point in the structure where two hull plates were riveted together. The hull collapsed inward, the nearly 150 psi of water pressure knocking a huge hole in the pressure hull. Further collapse was stopped only by the | <div style="text-align: justify;"><span style="color:#00008B">Once the dock was fully out of the water, the full extent of the damage to the F-4 was visible for the first time. The implosion started in the overhead of the torpedo room, near the torpedo loading hatch. It was a natural weak point in the structure where two hull plates were riveted together. The hull collapsed inward, the nearly 150 psi of water pressure knocking a huge hole in the pressure hull. Further collapse was stopped only by the rapid flooding of the rest of the boat. | ||
In this view the boat is upside down, with the port side facing up, looking at the bow. The strake like object at the top is the port side bilge keel, with the main keel just to the right of that. It is important to understand that the leaking battery acid did not cause the implosion. The battery acid weakened the bottom of the hull structure, causing a leak which made the boat heavy, quickly resulting in a loss of control. It was when the boat exceeded crush depth that the hull imploded. | In this view the boat is upside down, with the port side facing up, looking at the bow. The strake like object at the top is the port side bilge keel, with the main keel just to the right of that. It is important to understand that the leaking battery acid did not cause the implosion. The battery acid weakened the bottom of the hull structure, causing a leak which made the boat heavy, quickly resulting in a loss of control. It was when the boat exceeded crush depth that the hull imploded. | ||
| Line 281: | Line 333: | ||
[[File:F-4 salvage dd 5.jpg|left|500px]] | [[File:F-4 salvage dd 5.jpg|left|500px]] | ||
<div style="text-align: justify;"><span style="color:#00008B">Once all the excitement died down the Navy let several | <div style="text-align: justify;"><span style="color:#00008B">Once all the excitement died down the Navy let several photographers in to record the damages. The man at the right looks to be operating a movie camera. | ||
<small>Photo in the private collection of Ric Hedman.</small> | <small>Photo in the private collection of Ric Hedman.</small> | ||
| Line 309: | Line 361: | ||
<div style="text-align: justify;"><span style="color:#00008B">A sailor, who appears to be a second class petty officer, stands alongside the F-4. He has a pretty grim look on his face. Could be a sailor from one of the other F-class submarines. | <div style="text-align: justify;"><span style="color:#00008B">A sailor, who appears to be a second class petty officer, stands alongside the F-4. He has a pretty grim look on his face. Could be a sailor from one of the other F-class submarines. | ||
The extensive damage to the after end of the submarine is very evident. Remembering that the submarine is almost upside down, the | The extensive damage to the after end of the submarine is very evident. Remembering that the submarine is almost upside down, the twisted piece of metal to the left and twisted towards the camera is actually part of the upper skeg running from the deck to the rudder. It has been bent over more than 90 degrees. The blades of the screws have been bent over and a huge chip has been made in the blade of the screw. | ||
<small>Photo in the private collection of Ric Hedman.</small> | <small>Photo in the private collection of Ric Hedman.</small> | ||
| Line 316: | Line 368: | ||
[[File:F-4 salvage dd 8.jpg|left|500px]] | [[File:F-4 salvage dd 8.jpg|left|500px]] | ||
<div style="text-align: justify;"><span style="color:#00008B">In a photo taken several days later, if you look closely you can see that the bent propellers have been removed from the | <div style="text-align: justify;"><span style="color:#00008B">In a photo taken several days later, if you look closely you can see that the bent propellers have been removed from the shafts. A large hull plate has been removed from the engine room area to facilitate the removal of the bodies of the crew. Most of the crew took refuge there as fumes and water filled the rest of the boat, but quickly died when the watertight door failed under pressure. There is also a smaller hole on the bottom (top) of the submarine, perhaps to pump fuel out of tanks. | ||
<small>Photo in the private collection of Ric Hedman.</small> | <small>Photo in the private collection of Ric Hedman.</small> | ||
| Line 365: | Line 417: | ||
[[File:F-4 hoggett.jpg|left|500px]] | [[File:F-4 hoggett.jpg|left|500px]] | ||
<div style="text-align: justify;"><span style="color:#00008B">James Morton Hoggett, | <div style="text-align: justify;"><span style="color:#00008B">[[Hoggett|'''James Morton Hoggett, Electrician's Mate 3rd Class''']], was the only member of the F-4 crew to not die that fateful day. | ||
On March 25, 1915 he was left ashore when the F-4 went out on her fateful morning dive. It was a habit for the early submarines to leave one man ashore as a watchman, perhaps to keep an eye on ships material left on the dock and to be a contact person for any information that needs to be reported to the vessel as soon as it returns to port. This was the days before ship radios became common. It happened to be his turn this day. | On March 25, 1915 he was left ashore when the F-4 went out on her fateful morning dive. It was a habit for the early submarines to leave one man ashore as a watchman, perhaps to keep an eye on ships material left on the dock and to be a contact person for any information that needs to be reported to the vessel as soon as it returns to port. This was the days before ship radios became common. It happened to be his turn this day. | ||
In most all of the the news reports after the sinking reported he was on | In most all of the the news reports after the sinking reported he was on shore leave at the time instead of being the "watchman". There was one other man who escaped the sinking, Arthur Mellien, a Chief Machinist Mate, who transferred off the F-4 a few days prior to the sinking. | ||
In the aftermath of the sinking, Hoggett seems to have developed symptoms of PTSD. Accounts of his doings and happenings after the sinking show he seems to have become fairly reckless in his activities and had a number of close to death encounters. Of course nothing was known about PTSD at that time. | In the aftermath of the sinking, Hoggett seems to have developed symptoms of PTSD. Accounts of his doings and happenings after the sinking show he seems to have become fairly reckless in his activities and had a number of close to death encounters. Of course nothing was known about PTSD at that time. | ||
| Line 401: | Line 453: | ||
She is still there to this day. In 1940 she was rolled into a trench dredged in the loch bottom to make way for the expansion of docks at the submarine base. She sits at an angle of 43.5 degrees true about 40 feet off the Sierra 13 mooring, roughly parallel to the old shore line (see below). | She is still there to this day. In 1940 she was rolled into a trench dredged in the loch bottom to make way for the expansion of docks at the submarine base. She sits at an angle of 43.5 degrees true about 40 feet off the Sierra 13 mooring, roughly parallel to the old shore line (see below). | ||
Why the Navy never properly disposed of the wreck by scrapping (like [[Notable Submarine Accidents|'''the S-51''']]) or by towing her to deep water and sinking her (like the [http://www.navsource. | Why the Navy never properly disposed of the wreck by scrapping (like [[Notable Submarine Accidents|'''the S-51''']]) or by towing her to deep water and sinking her (like the [http://www.navsource.net/archives/01/maine1.htm '''USS Maine''']) is a bit of a mystery. The webmasters have speculated that the Navy wanted to retain the wreck in an accessible location as evidence until potential future legal proceedings had a chance to play themselves out. Perhaps once it became apparent that there was not going to be any further need to retain the wreck it was decided that doing anything with it was not worth the expense. | ||
<small>Clipping courtesy of the Honolulu Star-Bulletin.</small> | <small>Clipping courtesy of the Honolulu Star-Bulletin.</small> | ||
| Line 519: | Line 571: | ||
Page created by:<br> | Page created by:<br> | ||
<small>Ric Hedman & David Johnston<br> | <small>Ric Hedman & David Johnston<br> | ||
©1999 - 2025 - PigBoats.COM<br> | |||
Mountlake Terrace, WA, Norfolk, VA<br> | Mountlake Terrace, WA, Norfolk, VA<br> | ||
webmaster | [mailto:webmaster@pigboats.com '''webmaster@pigboats.com''']</small> | ||
</center> | </center> | ||
[[File:Subs bottom line 2.jpg]] | [[File:Subs bottom line 2.jpg]] | ||
Latest revision as of 18:24, 19 July 2025

The Crew
-
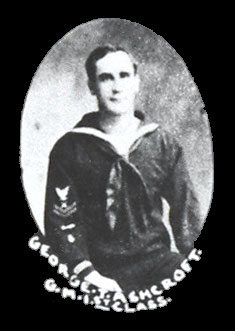 George T. Ashcroft, GM 1c
 -
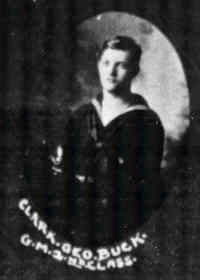 Clark G. Buck, GM 2c
 -
-
-
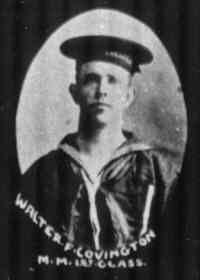 Walter F. Covington, MM 1c
 -
 George L. Deeth, EM 1c
 -
-
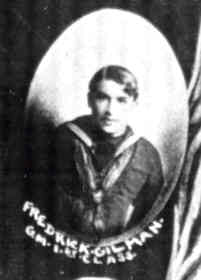 Frederick Gilman, GM 1c
 -
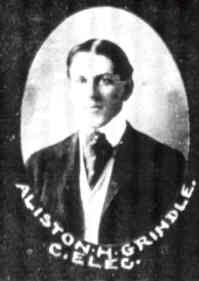 Aliston H. Grindle, CEM
 -
 Frank H. Herzog, EM 2c
 -
 Edwin S. Hill, MM 1c
 -
 Francis M. Hughson, MM 1c
 -
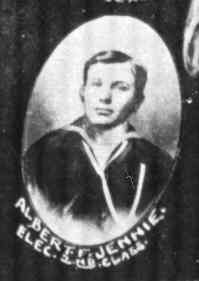 Albert F. Jennie, EM 2c
 -
-
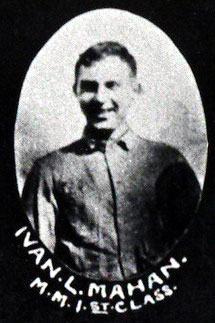 Ivan L. Mahan, MM 1c
 -
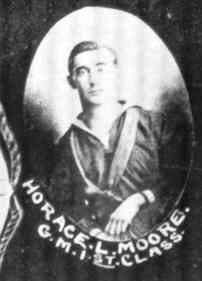 Horace L. Moore, GM 1c
 -
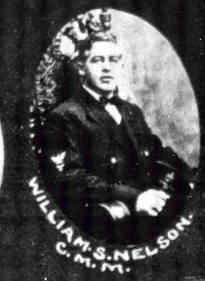 William S. Nelson, CMM
 -
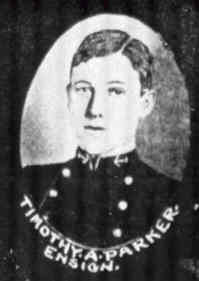 Timothy A. Parker, LT, Executive Officer
 -

-
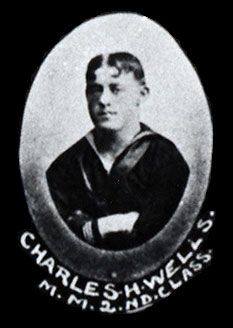 Charles H. Wells, MM 2c
 -
 Henry A. Withers, GM 1c


Photos courtesy of On Eternal Patrol.com.
![]()

This newspaper photo was taken prior to the F-4 sailing to San Pedro and then Hawaii. All but two of the men shown here were on that fateful last dive. Those two had already been transferred off the F-4 and sent to other vessels. They almost all seem to be puffing on cigars. The man highest in the photo, center, is Earnest Cauvin. It isn't known if the dog held by Edwin Hill is his own dog or possibly the sub's mascot.
Image provided by: Penn State University Libraries, University Park, PA. Evening Public Ledger, March 31, 1915
![]()

This photo of submarine crews contains six men from the ill-fated F-4. The photo appears to have been taken on the deck of the F-1. EM 1c George L. Deeth is the second man from right. To his right (camera left) is MM 1c Edwin Hill. On the other side of Deeth is MM 1c Francis M. Hughson. The man in the center with the coveralls is CEM Harley Colwell. The second man from left is GM 2c Archie H. Lunger. Seated, second from right is CGM Frank C. Pierard. The rest of the men are not identified and are no doubt F-1 crew members . This photo taken prior to March 25, 1915. Lunger & Pierard were Brother-in-laws, married to sisters. Pierard had children, Lungers wife was pregnant but he never got to see his child. Read their story here.
The one F-1 known crew member is CMM John Peter Albert Messang seated first man on right. He was aboard the USS F-1 when it was in collision with the F-3 in 1917 and sank taking Messang and 18 other of the crew to their deaths. Three were saved.
Photo in the private collection of Ric Hedman.
![]()

Newspaper photo posted in the Denver Post on March 29, 1915 showing three F-4 crewmen posing for the camera. The man on the left is believed to be MM 1c Edwin Hill. In the center is CEM Harley Colwell, with GM 2c Clark G. Buck on the right.
Photo from the family collection of George Myers who is a distant cousin of Clark Buck.
![]()
Search for the Lost Boat

Here three men are in a very small rowboat. Two of them are using a box with a glass plate in the bottom that allowed a clearer view of things underwater. These boxes actually worked quite well, but only to view divers at shallower depths. The water at the wreck's original depth was far too deep for these men to see the wreck in any detail.
Photo in the private collection of Ric Hedman.
![]()

According to the Board of Investigation Report, when the anchor was discovered Chief Gunners Mate Jack Agraz, a Navy diver from the USS F-1, donned his gear and followed the line to the target. Three crews of four men each manned the hand turned air pump supplying air to him. He discovered the grapple chain was wrapped around "an old anchor" at 215 feet. The F-4 had not been found.
Photo in the private collection of Ric Hedman.
![]()

Photo in the private collection of Ric Hedman.
![]()

Photo in the private collection of Ric Hedman.
![]()

Photo in the private collection of Ric Hedman.
![]()

Photo in the private collection of Ric Hedman.
![]()

Photo in the private collection of Ric Hedman.
![]()

Photo in the private collection of Ric Hedman.
![]()

Jack Agraz and Chief Gunner's Mate G.R. Evans taking a break during the search phase of F-4 diving operations, circa March, 1915.
U.S. Navy photo from the Vallejo Naval Museum via Darryl Baker.
![]()


Copyright The New York Times
![]()

This article is from the Honolulu Star Bulletin dated April 1, 1915. It describes the work to build and test a diving chamber that would be used to survey the wreck and determine further courses of action. The great depth at which F-4 laid was difficult for divers to work at. Sending them down in a pressurized chamber would be much safer than the no-dress open helmet rigs then being used.
Copyright The Honolulu Star Bulletin. Retrieved from the Vallejo Naval Museum by Darryl Baker.
![]()

A nice photo of the diving chamber. No actual work could be performed from it, and it was for observational purposes only. The chamber would be lowered to various locations around the wreck, allowing a complete survey to be performed that would greatly aid in the subsequent salvage efforts. The divers inside could observe in relative safety and comfort. Air was surface supplied through hoses, and telephone lines were provided so that real time observations could be called back up to the surface. Diver Jack Agraz and another engineer made the initial test dives in Honolulu Harbor to verify its integrity, and likely made the first dives to the bottom near the wreck.
U.S. Navy photo from the Vallejo Naval Museum via Darryl Baker.
![]()
Salvage Work

Photo in the private collection of Ric Hedman.
![]()

Photo in the private collection of Ric Hedman.
![]()

Photo in the private collection of Ric Hedman.
![]()


These three photos are very interesting to the naval historian. In 1915 Navy Chief Gunner George Stillson was still in the development phase for the well-known Mark V diving dress that would come to prominence in the 1920s. The Mk V was the ultimate refinement of the hard hat diving rigs, and was the envy of the world's diving community. But it didn't pop into existence overnight. Stillson and his team experimented with and evaluated nearly all of the available diving helmets and rigs in U.S. at the time, finding out which features worked and which didn't. The lessons learned where all poured into the highly refined Mk V.
Since the Mk V was not yet developed during the F-4 salvage, the divers used whatever was in the Navy's stock at the time. This was represented by a variety of rigs, at least two of which are represented in the first picture. Four diving suits are hanging up to dry in the background. In the foreground are three helmets of two different designs.
The helmet on the left was manufactured by a company called A. Schrader's Son Inc. of New York City. This view is of the left side of the helmet and attached breast plate, with the helmet turned slightly to the left. It is a four window (called a "light") model. The Schrader design is characterized by round side and front lights with an oval shaped top light. The front light (the one in front of the diver's face) is removable by a screwing action. Slightly behind and below the left side light is a cup that housed a recessed telephone speaker/microphone. There are twelve bolts on the breast plate that secure removable clamp bars that hold the breast plate to the diving suit. In the Navy inventory this helmet and breast plate would be known as a Mk IV.
The other two are curiosities. These two were made by the A.J. Morse & Son Company in Boston. These are three light models (no top light) with oval side lights, a hallmark of the Morse design. The absence of a top light indicates that these are likely not Navy stock models and are from Morse's commercial line. The Navy really preferred having a top light as it gave the diver better visibility. These commercial models were likely commandeered by the Navy due to the lack of suitable diving rigs in their inventory. The helmet on the right is a view of the back of the helmet, showing the exhaust valve and vertical bubble tube diffuser behind the right side light. This was an awkward arrangement shared by both the Morse and Schrader helmets and was disliked because it was hard to reach by the diver. The Navy version of the Morse design had the top light and was known as a Mk III.
The second photo shows an actual Morse Mk III four light helmet. The photo illustrates an early telephone arrangement, with the wire leading into a watertight connection on the back of the helmet. Before use the helmet wire would be covered by a rubber sheath to prevent electrical shorts. On the left on top of the box is a headset and speaking mic likely used by the topside telephone man to talk to the diver. In this early rig the diver likely wore a headset as well. Later versions would use a simpler combination speaker/mic located in a recessed cup on the front of the helmet.
The third photo shows a decompression chamber on the diving barge during the salvage phase. Decompression sickness, also known as "the bends", is an omnipresent danger for deep-sea divers. The decompression chamber was used to recompress the dissolved nitrogen in the divers blood, preventing it from bubbling up in the blood stream and crippling or even killing the diver when they returned to the lower pressure surface. The chamber allowed the gradual removal of the pressure, allowing the diver's body to remove the unneeded chemical through normal breathing. These principals and a series of detailed tables to guide the decompression process were developed by John Scott Haldane and were just coming into accepted use by the USN at the time of the F-4 salvage work.
U.S. Navy photos from the Vallejo Naval Museum via Darryl Baker.
![]()

This photo shows a diver during the salvage phase utilizing a Morse helmet with oval side lights. It is not clear if the helmet is a three or four light model. This shows another variation in the telephone line inlet, above and to the right of the air hose inlet, opposite of the Morse helmet shown in the second gallery photo above. There were a lot of on-the-spot modifications being made to the helmet configurations during this operation, as divers learned quickly what was working and what was not. Also, incorporating commercial helmets required bringing them up to Navy standard, forcing many field modifications. This diver does not have a weight belt on, and the authors are not entirely sure if the familiar weight belt with shoulder straps was yet being used.
U.S. Navy photos from the Vallejo Naval Museum via Darryl Baker.
![]()
Raising the Boat with Pontoons

The rope that is being worked on by the men on deck can be seen floating in the water in front of the submarine. There is a similar one stretching from the after deck to what is assumed to be the salvage barge. The F-2 is probably in the process of mooring to that barge to supply the air needed for the pontoons.
Note the proximity to the shore. The F-4 sank just outside of the entrance to Honolulu Harbor, in Mamala Bay. With Oahu essentially being the top of an underwater mountain, the water depth drops off precipitously as soon as you leave the harbor.
Photo in the private collection of Ric Hedman.
![]()

Photo in the private collection of Ric Hedman.
![]()


In the third photo the small tug, behind the speeding launch, is the the Young Brothers "Louise", one of their small flotilla of commercial vessels for hire that was were used by the Navy in this salvage operations.
Photos in the private collection of Ric Hedman.
![]()

In the center background is the Navy floating cantilever pontoon crane YD-25. The crane had a lifting rating of 150 tons. Too little to have lifted the flooded F-4. She was destined to become a visual fixture at Pearl Harbor for the next dozen years.
The tug, "Helen" from the Young Brothers Commercial fleet is escorting the F-4 in the background.
In the left background the USS Maryland is moored. She is the vessel that brought the six lifting pontoons to Hawaii.
Newspaper photo.
![]()

Photo in the private collection of Ric Hedman.
![]()

Photo from Beneath the Surface: WWI Submarines Built in Seattle and Vancouver by Bill LIghtfoot.
![]()


Photos in the private collection of Ric Hedman.
![]()
In Drydock

At the time of the Navy contract the drydock had been reserved for the tug Printer, recently sold to Hilo businessman G. B. Marshall. He needed the tug to help to build the breakwater at Hilo Harbor for which he had won the contract. Printer needed some repairs after a collision with one of her rock hauling scows, and the new owners wired the dry dock and reserved space to have work done. When the F-4 was finally raised and moved to the dry dock there was room for the Printer to fit aft of her. It was expected the repairs to the Printer would require 24 hours of work night and day to get the rush job done, but with the F-4 now in the dock with her the work on Printer could proceed at a more leisurely pace. Note the scaffolding has yet to be put in place around the tug.
Newspaper photo.
![]()

Photo in the private collection of Ric Hedman.
![]()

Photo in the private collection of Ric Hedman.
![]()

In this view the boat is upside down, with the port side facing up, looking at the bow. The strake like object at the top is the port side bilge keel, with the main keel just to the right of that. It is important to understand that the leaking battery acid did not cause the implosion. The battery acid weakened the bottom of the hull structure, causing a leak which made the boat heavy, quickly resulting in a loss of control. It was when the boat exceeded crush depth that the hull imploded.
Admiral Clifford J. Boush, Commandant of the 14th Naval District in Hawaii, is seen in the foreground, wearing the long white coat.
Photo in the private collection of Ric Hedman.
![]()

Photo in the private collection of Ric Hedman.
![]()
-
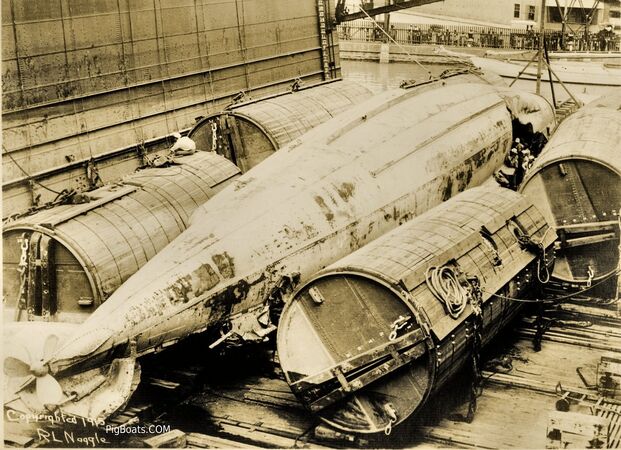 Photo in the private collection of Ric Hedman.
 -
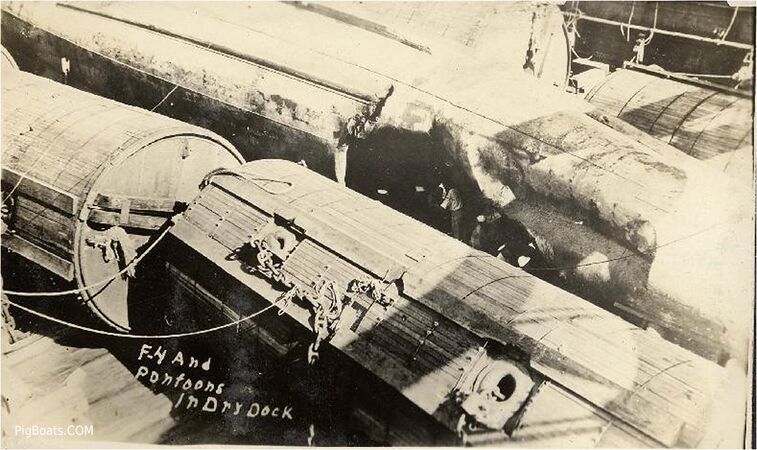 Photo courtesy of Mike Dilley, whose father, Homer 'Pat' Dilley, sailed aboard the USS F-2.


![]()

These newly installed experimental propellers were of a special design that were intended for low RPM and high efficiency. It is thought that at high speeds they would have done little to drive the submarine to the surface. The official report stated that these propellers "were the secondary cause of the disaster" by providing insufficient water flow over the stern planes and thus negatively impacting the control of the vessel.
Photo in the private collection of Ric Hedman.
![]()

The extensive damage to the after end of the submarine is very evident. Remembering that the submarine is almost upside down, the twisted piece of metal to the left and twisted towards the camera is actually part of the upper skeg running from the deck to the rudder. It has been bent over more than 90 degrees. The blades of the screws have been bent over and a huge chip has been made in the blade of the screw.
Photo in the private collection of Ric Hedman.
![]()

Photo in the private collection of Ric Hedman.
![]()

Photo in the private collection of Ric Hedman.
![]()

Photo in the private collection of Ric Hedman.
![]()

This photo shows the F-4 with her bow cap rotated to line up with two of her four torpedo tubes. This was done so that the weapons in the tubes could be removed. To access the other two tubes the cap was rotated to the right. To completely close all four tubes the cap was rotated so that the openings were vertical and behind the stem.
Photo in the private collection of Ric Hedman.
![]()

Photo in the private collection of Ric Hedman.
![]()

Photo in the private collection of Ric Hedman.
![]()
Post Salvage

On March 25, 1915 he was left ashore when the F-4 went out on her fateful morning dive. It was a habit for the early submarines to leave one man ashore as a watchman, perhaps to keep an eye on ships material left on the dock and to be a contact person for any information that needs to be reported to the vessel as soon as it returns to port. This was the days before ship radios became common. It happened to be his turn this day.
In most all of the the news reports after the sinking reported he was on shore leave at the time instead of being the "watchman". There was one other man who escaped the sinking, Arthur Mellien, a Chief Machinist Mate, who transferred off the F-4 a few days prior to the sinking.
In the aftermath of the sinking, Hoggett seems to have developed symptoms of PTSD. Accounts of his doings and happenings after the sinking show he seems to have become fairly reckless in his activities and had a number of close to death encounters. Of course nothing was known about PTSD at that time.
He left the Navy in 1916 and when WWI came around he enlisted in the Army Tank Corps in 1918. He survived the war.
James Hoggett died May 31, 1952 in Rolla, MO. He had served on the USS Pensacola, Pittsburgh, Oregon, Maryland, Pennsylvania, the Alert, (a submarine tender), the F-4 and the USS Constellation before being discharged. He was a lucky person to have lived out a normal life span that his shipmates on the F-4 were denied.
Photo in the private collection of Ric Hedman.
![]()

The drawing above was made of the F-4 Automatic Blow System after recovery. It shows the setup and condition of the system made by the crew at the time of the disaster. Short of actually being able to talk to the crew it shows the steps they had taken in the few moments available to them.
This system is something akin to today's Emergency Blow system brought about by the sinking of the USS Thresher (SSN-593) in 1963, although the F-4's system was automatic, whereas the modern system must be manually actuated.
Image from the National Archives.
![]()

The Navy was under a time crunch, as they had to vacate the drydock in order to get the other three F-boats in the drydock for repairs. They had been damaged, but not sunk, when they were accidentally rammed by the USS Supply, a Navy ship, while nested together at their pier in Honolulu Harbor. The F-2 was the most badly damaged but she, in turn crashed into the F-1 and F3 causing them damage as well. They also had to let the tug that was in the dock behind the sub out since its repairs were long completed.
On the evening of September 14, 1915 she was refloated once again, suspended from her pontoons. The tug Navajo towed her up the coast to Pearl Harbor. Navajo took her to what was then a backwater section of the harbor called Magazine Loch. She towed F-4 into the loch until she grounded in the soft mud. She was left there until the investigation was complete. The Navy dithered as to what to do with the sub, so it was decided to just leave her where she sat. On November 25 the pontoon chains were cast loose and the F-4 was allowed to settle into the soft mud of the bottom of the loch.
She is still there to this day. In 1940 she was rolled into a trench dredged in the loch bottom to make way for the expansion of docks at the submarine base. She sits at an angle of 43.5 degrees true about 40 feet off the Sierra 13 mooring, roughly parallel to the old shore line (see below).
Why the Navy never properly disposed of the wreck by scrapping (like the S-51) or by towing her to deep water and sinking her (like the USS Maine) is a bit of a mystery. The webmasters have speculated that the Navy wanted to retain the wreck in an accessible location as evidence until potential future legal proceedings had a chance to play themselves out. Perhaps once it became apparent that there was not going to be any further need to retain the wreck it was decided that doing anything with it was not worth the expense.
Clipping courtesy of the Honolulu Star-Bulletin.
![]()

Note in the background that at this point that only a narrow causeway connects the main part of the Submarine Base to Kuahua Island. As the base rapidly expanded in the 1930's and 1940's this area would be completely filled in and Kuahua would no longer be an islet.
National Archives photo.
![]()

Photo in the private collection of Ric Hedman.
![]()

![]()
F-4 Legacy

Photo courtesy of the USS Bowfin Submarine Museum and Park.
![]()

Four of the F-4 crew had been identified and were laid to rest separately at locations chosen by their families.
Newspaper photo.
![]()

Photo in the private collection of Ric Hedman.
![]()

Photo in the private collection of Ric Hedman.
![]()


Photo courtesy of William Dornick
![]()


Photo courtesy of FindAGrave
![]()


Newspaper Article - The body of Frank N. Herzog, bluejacket, who went down with submarine F-4 in Honolulu Harbor in March, arrived in Salt Lake (City) on September 23, after a long journey which began at Honolulu seventeen days previous. Herzog's home was in Salt Lake (City).
Soda Springs Sun; Soda Springs, Idaho. September 30, 1915; Page Three.
Photo courtesy of FindAGrave
![]()


Buried in Elmwood Cemetery, Norfolk, Virginia, USA, Plot ELM EXT, Block 6 Lot 4 Sp 1S
Photo courtesy of FindAGrave
![]()

Photo courtesy of Dr. Terrell Newby.
![]()

Photo courtesy of Dr. Terrell Newby.
![]()
Page created by:
Ric Hedman & David Johnston
©1999 - 2025 - PigBoats.COM
Mountlake Terrace, WA, Norfolk, VA
webmaster@pigboats.com
![]()